: Mongoose provides a straight-forward, schema-based solution to model your application data. It includes built-in type casting, validation, query building, business logic hooks and more, out of the box.(mongoosejs.com/)
Mongoose를 사용하는 이유
: Mongoose를 사용하여 Javascript와 MongoDB를 연결하여 사용할 수 있다. 즉 Javascript 코드를 통해 CRUD(Create, Read, Update, Delete) 가능하다.
Mongoose 설치
: # npm install mongoose
[그림 1] Installation of the mongoose
Javascript에서 mongoose 사용 방법
const mongoose = require("mongoose"); //mongoose 패키지 로드
mongoose.connect("mongodb://localhost/cat_app", { userNewUrlParser: true}); // mongoose와 mongdb를 연결한다.

const catSchema = new mongoose.Schema({
// DB에 사용될 schema를 정의한다. 아래와 같이 3개의 Key-Value 쌍을 가진 데이터를 생성
	name: String,
	age: Number,
	temperament: String
});

const Cat = mongoose.model("Cat", catSchema);
//catSchema를 mongoDB 모델로 컴파일한다. 즉 위에서 선언된 catSchema 각각의 Key-Value 모델을 Cat에 저장하여
// mongo shell 에서 사용하듯 작업할 수 있는 모델로 변경한다.
September 7th 2020 Update (important, please read carefully):
Hi there,
Please note that your Goorm container already has MongoDB installed if you followedthe instructionslinked inlecture 248.
If for whatever reason your Goorm container doesnothave MongoDB installed, then please followthese instructionsto add MongoDB to your existing Goorm container.
To run the mongod server in your container, simply typemongodin the terminal window/tab and press enter/return.
This will start the server that is required for you to connect to the mongo shell or connect to a mongodb database in your node applications.
Youmustleave mongod running in its own terminal while you are working with either the mongo shell or a node app that requires a database. Once you are done working you may return to the mongod terminal tab and turn it off by pressingctrl+d(that is control and d at the same time).
You can run the mongo shell (where you will access your databases directly) in another terminal window/tab by running themongocommand. Once inside of the shell, you can run the commands that will be taught in the next lecture. To exit the shell typeexitand press enter/return (or just pressctrl+d).
As a side note:In theMongo Shell Basics videothat follows, you will see Colt use theshow collections command which will show something calledsystem.indexes . This will no longer show up in the latest versions of MongoDB. You can read more about thishere.
The table below summarizes the main differences between SQL and NoSQL databases.
SQL DatabasesNoSQL Databases
Data Storage Model
Tables with fixed rows and columns
Document: JSON documents, Key-value: key-value pairs, Wide-column: tables with rows and dynamic columns, Graph: nodes and edges
Development History
Developed in the 1970s with a focus on reducing data duplication
Developed in the late 2000s with a focus on scaling and allowing for rapid application change driven by agile and DevOps practices.
Examples
Oracle, MySQL, Microsoft SQL Server, and PostgreSQL
Document: MongoDB and CouchDB, Key-value: Redis and DynamoDB, Wide-column: Cassandra and HBase, Graph: Neo4j and Amazon Neptune
Primary Purpose
General purpose
Document: general purpose, Key-value: large amounts of data with simple lookup queries, Wide-column: large amounts of data with predictable query patterns, Graph: analyzing and traversing relationships between connected data
Schemas
Rigid
Flexible
Scaling
Vertical (scale-up with a larger server)
Horizontal (scale-out across commodity servers)
Multi-Record ACID Transactions
Supported
Most do not support multi-record ACID transactions. However, some—like MongoDB—do.
Joins
Typically required
Typically not required
Data to Object Mapping
Requires ORM (object-relational mapping)
Many do not require ORMs. MongoDB documents map directly to data structures in most popular programming languages.
이번 클래스는 페이지에서 적용할 내용은 다음과 같다. 각 페이지별로 적용 할 수도 있지만 DRY(Don't Repeate Youself)를 적용하기 위해 공통부분을 header.ejs에 적용한다.
1. Contents를 중앙에 위치 시키기
2. 각 페이지 상단에 navbar 추가 및 Login, Sign Up, Logout button 적용
3. <input> 박스를 좌우가 아닌 상하로 위치시키고, 버튼 디자인 적용
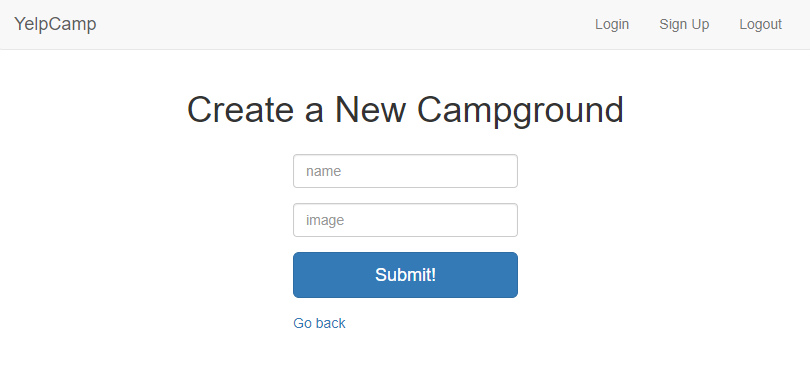
[그림 1] Navbar class로 디자인 적용 전(좌) 후(우)
1. Contents를 중앙에 적용
기존 news.ejs 코드
<%- include("partials/header")%>

<h1>Create a New Campground</h1>
<form action="/campgrounds" method="POST">
	<input type="text" name="name" placeholder="name">
	<input type="text" name="image" placeholder="image">
	<button>Submit!</button>
</form>

<a href="/campgrounds">Go back</a>
<%- include("partials/footer")%>


아래와 같이 변경한다.

<%- include("partials/header")%>
<div class="container">		<!-- 모든 컨텐츠를 중앙에 위치시키도록 container class를 이용 -->
	<div class="row"> 		<!-- input 박스를 좌우가 아닌 상하로 표시하기 위해 row class 적용 -->
		<h1 style="text-align: center;">Create a New Campground</h1> <!-- text가 중앙에 출력되도록 text-align 적용 -->
		<div style="width: 30%; margin: 25px auto;"> <!-- input box의 크기를 30%로 적용하고, form 태그를 감싸는 div 상하에 25px, 좌우에 auto로 margin을 적용 -->
			<form action="/campgrounds" method="POST">
				<div class="form-group">			<!-- 각 input 태그 상하에 여유공간을 주기 위해 개별로 form-group 설정-->
					<input class="form-control" type="text" name="name" placeholder="name">
				</div>
				<div class="form-group">
					<input class="form-control" type="text" name="image" placeholder="image">
				</div>
				<div class="form-group">
					<button class="btn btn-lg btn-primary btn-block">Submit!</button> <!-- 버튼 사이즈를 증가시키고, 색상 변경-->
				</div>
			</form>
			<a href="/campgrounds">Go back</a> <!-- a 태그 또한 form div에 적용시켜 input 태그와 크기를 일치화시킨다.-->
		</div>
	</div>

</div>
<%- include("partials/footer")%>
[그림 2] css 디자인을 적용한 new.ejs
2. 상단 메뉴바를 디자인 한 후 모든 페이지에 적용될 수 있도록 header.ejs에 적용
partials/header.ejs

<!DOCTYPE html>
<html>
	<head>
		<title>Yelpcamp</title>
		<link rel="stylesheet" href="https://maxcdn.bootstrapcdn.com/bootstrap/3.3.5/css/bootstrap.min.css">
	</head>
	<body>


<!-- 아래와 같이 적용시킨다.-->

<!DOCTYPE html>
<html>
	<head>
		<title>Yelpcamp</title>
		<link rel="stylesheet" href="https://maxcdn.bootstrapcdn.com/bootstrap/3.3.5/css/bootstrap.min.css">
	</head>
	<body>
	<nav class="navbar navbar-default"> <!-- 페이지 최상단에 메뉴를 디자인 하기 위해 navbar-default 적용 -->
		<div class="container-fluid">    <!-- 텍스트가 들어갈 navbar-->
			<div class="navbar-header">	<!-- 헤더 생성, 페이지 이름이나 회사 이름을 적용시킬 때 사용-->
				<a class="navbar-brand" href="/">YelpCamp</a>  <!-- 브랜드를 강조하기 위한 클래스-->
			</div>
			<div class="collapse navbar-collapse">	<!-- 반응형으로 페이지 크기가 작아질 때 햄버거 메뉴 적용을 위해 추가 -->
				<ul class="nav navbar-nav navbar-right">  <!-- li태그를 상하가 아닌 좌우로 위치시기 위해 적용 -->
					<li><a href="/">Login</a></li>
					<li><a href="/">Sign Up</a></li>
					<li><a href="/">Logout</a></li>
				</ul>
			</div>
		</div>
	</nav>
1. BootSrtap의 <div class="container"> contents 를 가운데 정렬
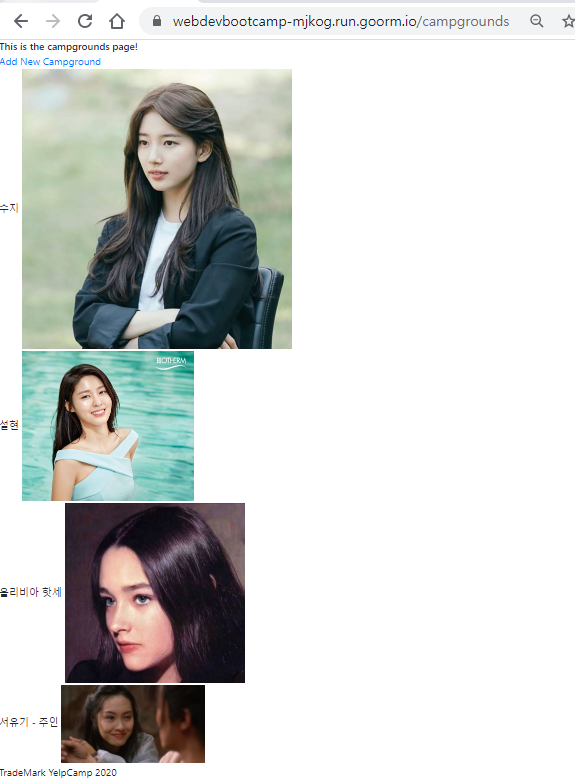
현재 campground.ejs는 프레임만 설정되어 있는 상태이며, 실제 브라우저에서 출력되는 이미지는 [그림 1]의 좌측 사진이다.
campground.ejs

<%- include("partials/header") %>

<h1>This is the campgrounds page!</h1>

<a href="/campgrounds/new">Add New Campground</a>
<% campgrounds.forEach((campground) =>{ %>
	<div>
		<h4>
			<%= campground.name %>
			<img src = "<%= campground.image %>">
		</h4>
	</div>
<%}) %>

<%- include("partials/footer") %>


<!-- 1 ~ 15 라인의 코드를 아래와 같이 <div class="container>로 묶어준다 -->


<%- include("partials/header") %>

<div class="container">
<h1>This is the campgrounds page!</h1>

<a href="/campgrounds/new">Add New Campground</a>
<% campgrounds.forEach((campground) =>{ %>
	<div>
		<h4>
			<%= campground.name %>
			<img src = "<%= campground.image %>">
		</h4>
	</div>
<%}) %>
</div>
<%- include("partials/footer") %>
[그림 2] <div class="container"> 로 묶어주기 전(좌) 후(우)
2. jumbotron을 활용하여 header 적용, Button 디자인과 화면에 출력될 이미지 갯수를 반응형으로 적용
2-1. jumbotron은 Bootstrp에서 자주 쓰이는 디자인 중 하나이며, 유저가 페이지에 접속했을 경우 이목을 끌기 위해 사용한다.
2-2. <div class="col-md-3 col-sm-6">
: div는 화면을 12분할로 계산하며, 해당 클래스를 적용할 경우 중간 해상도에서 개별 사이즈는 3/12(즉 총 이미지 숫자는 4개), 작은 해상도에서는 개별로 6/12(총 2개)가 출력된다. [그림 1]에서 볼 수 있듯이 이미지는 4개가 출력된다. 아래
<%- include("partials/header") %>
<div class="container">
<!--모든 태그를 container에 넣어 가운데로 정렬시킴(좌우 여백을 줌) -->
	<header class="jumbotron">
<!--div와 비슷한 역할을 함. 차이점은 semantic web 의미 분석 시 사용 -->
		<div class="container">
<!-- 헤더와 버튼을 디자인하기 위해 따로 묶어준다-->
          <h1>Welcome To YelpCamp!</h1>
          <p>View our hand-picked campgrounds from all over the world</p>
          <p>
              <a class="btn btn-primary btn-lg" href="/campgrounds/new">Add New Campground</a>
          </p>		<!-- Button 디자인 및 크기 조절-->
		</div>
	</header>


	<!-- thumnail 높이를 조절하여 최대한 센터에 맞춘다-->
	<div class="row text-center" style="display:flex; flex-wrap: wrap;">
		<% campgrounds.forEach((campground) =>{ %>
			<div class="col-md-3 col-sm-6">					<!-- 반응형으로 스크린 사이즈에 따라 한 줄에 출력될 이미지 개수를 지정한다.  -->
				<div class="thumbnail"> 					<!-- thumnail을 사용한다. 이미지는 가로를 100%로 잡았을 경우  -->
					<img src = "<%= campground.image %>">
					<div class="caption">
						<h4><%= campground.name%></h4>
					</div>
				</div>
			</div>
		<%}); %>
	</div>
</div>

<%- include("partials/footer") %>
HiEveryone, It has been brought to my attention that in the next lecture there's a slight editing fluke.
At 5:11 Colt adds a row div with an h3 that says: "Our Most Popular Campgrounds", but when he "heads back over" at 5:19 it's gone.
This isn't anything major, but I created this note to alleviate any potential confusion caused by the glitch.
You can leave the h3 element in there or remove it if you like.
Also, at around 3 minutes and 40 seconds into the video Colt uses the class namebtn-large to style the bootstrap button. The class name should actually be: btn-lg
Also, be sure to use bootstrap 3.3.x as version 4 has syntax differences and using it will break your project's layout. If you want to migrate from version 3 to 4 after completing the app then checkoutthis video.
app.post("/campgrounds", (req, res) => {    //express 서버에서 '/campgrounds'에 'POST'가 요청될 경우
	res.send("YOU HIT THE POST ROUTE");		// "YOU HIT.." 라는 데이터를 클라이언트로 response한다.
});

app.get("/campgrounds/new" (req, res) => { //	'/campegrounds/new'로 GET이 요청될 경우
	res.render("new")					   //   YelpCamp/v1/view 아래에서 new라는 이름의 파일을 찾아 렌더링하여 응답한다.
});
[그림 2]Postman으로 GET method Request
[그림 3] Postman으로 POST method Request
2. 데이터를 전달받을 ejs 생성
<%- include("partials/header")%>		<!--lesson 296 참조-->

<h1>Create a New Campground</h1>
  <form action="/campgrounds" method="POST">			<!--아래의 input 값을 POST method로 /campgrounds에게 request-->
    <input type="text" name="name" placeholder="Insert name">		<!--입력될 데이터는 name이란 이름 속성을 가지고 있음-->
    <input type="text" name="image" placeholder="Insert imageUrl">  <!--입력될 데이터는 image이란 이름 속성을 가지고 있음-->
    <button>Submit!</button>							<!--해당 버튼을 누르면 데이터가 전송됨-->
  </form>
<a href="/campgrounds">Go back</a>
<%- include("partials/footer"%>		<!--lesson 296 참조-->
[그림 4] new.ejs 페이지(/campgrounds/new 라는 주소를 가지고 있음 "1-3" 참조)
3. POST로 전달된 파라미터를 저장하여 /campgrounds에서 출력
3-1. /campgrounds/new로 받을 데이터를 저장하기 위한 array 설정
기존에 사용하고 있는 지역변수인 campgrounds를 전역변수로 재설정하여 /campgrounds/new 에서 해당 array에 접근할 수 있도록 한다. 만약 campgrounds array가 지역변수로 되어 있을 경우 다른 메소드에서 해당 값에 접근이 불가능하다.
[그림 5] 단순히 app.get("/campgrounds", (req, res)...... 메소드 내부에 있는 데이터를 밖으로 빼주면 된다.
3-2. /campgrounds로 들어온 POST 요청에 들어있는 name과 image 저장
app.post("/campgrounds/new", (req, res) => {  // /campgrounds/new라는 주소를 post로 요청받으면 아래 로직 수행
	const name = req.body.name		// 서버로 요청된 body태그 내의 name이란 name을 가진 데이터를 const name에 저장
    const image = req.body.image 	// 서버로 요청된 body태그 내의 image란 name을 가진 데이터를 const image에 저장
    const newCampground = {name: name, image: image} // 위의 전달 받은 데이터를 newCampground object에 저장
    campgrounds.push(newCampground) // 전역변수 campground array에 newCampground object를 push(입력) 한다.
    res.redirect("/campgrounds")    // 마지막으로 응답 시 /campgrounds로 페이지를 리다이렉트 시킨다.
});
최종적으로 저장된 값은 그림 5의 const campgrounds에 저장된다.
3-3. campgrounds.ejs에 새로운 name과 image를 추가할 수 있는 페이지로 이동하는 링크 추가
<%- include("partials/header%>

<h1> This is the campgrounds page! </h1>
<a href="/campgrounds/new">Add New Campground</a>		<!--/campgrounds/new로 이동하는 링크 추가-->

<% campgrounds.forEach((campground) => {%>
  <div>
        <h4>
            <%= campground.name %>
            <img src="<%= campground.image %>">
        </h4>
  </div>
<%});%>

<%- include("partials/footer") %>
4. 실제 서버 동작여부 테스트
4-1. /campgrounds로 접속
[그림 6] Add new Campground 링크 클릭
4-2. /campgrounds/new 페이지에서 실제 데이터 입력 및 submit 버튼 클릭
[그림 7] 필드에 데이터 입력
[그림 8] Reqest Method: POST 로 [그림 7]에서 입력한 데이터를 클라이언트에서 서버로 전달.